Showing posts with label Refrigerator Enclosure. Show all posts

Friday, June 27, 2014

A Year Later....

Today marks one year in our waterfront cottage.  June 27, 2013 was the first night we spent in the house and the next day we rented a jack hammer and started the updates.  It has been 12 months of work.  A LOT OF WORK.

Blittle and I were sitting on the dock the other evening baffled by how we did so much in a year.  No wonder I am so tired!  Once I am done with the dock furniture, we are taking a break from DIY for a while.  People have repeatedly said, it doesn't have to all get done right now.  I know this. But I want it done right now.  When I am home there are constant reminders of what needs to be done and I have a hard time ignoring them.  I get anxious.  If I am not crossing things off the to do list, I feel like I am wasting time.  The past month has shown me it is time for a break.  My body is tired, exhausted, drained, done...I can't really find a word to describe the level of physical, mental and emotional exhaustion that I am on.  It is time to rest and slow down a little.

The next few months are for working on client furniture and saving money.  There are some HUGE projects on the list for 2015!

Thursday, May 22, 2014

DIY Kitchen Reveal Update

January 2016 Update: Visit our new blog www.brianandkaylor.com  


It has been over 7 months since I revealed our kitchen makeover.  It is hard to believe it has been that long and I am speechless about all the opportunities and attention that came with this experience.  I never thought I would be doing anything other than teaching much less having a blog, guest blogging on Remodelaholic and being featured in Better Homes & Gardens Kitchen and Bath Makeover Magazine.  How is this even my life?


When I first revealed the kitchen in October, it was bare bones.  Just finished and barely used.  Naked.  Nothing on the counters, no curtains, nothing.  Now it has some personal touches, curtains and it is definitely more lived in.


To see the first reveal click here.


Here is what I started with.


Here are the updated photos.  Thanks again to Jessica of Ever & Anon Photography for taking the amazing pictures.


Photo Credit:  Ever & Anon Photography


Photo Credit:  Ever & Anon Photography

Tuesday, December 31, 2013

FWF's Year Review - 2013

What a difference a year makes.  This has been a huge year for Fisherman's Wife Furniture and for me personally.  This marks one full year out of the classroom and being a full time business owner.  Somedays I still can't believe it and I am waiting for someone to come take it all away.

Over the past few months, many new followers and readers have come along so I want to do a quick review of my favorite and/or most popular posts from 2013.

Friday, November 1, 2013

1 Year Blogiversary

Happy Birthday, Blog!

I can't beleive it has been a year already.  So much has happened and changed in our lives in the past 12 months.  Most mornings I wake up in denial that this is my life.  One short year ago, I was living in New Orleans, teaching high school geometry and refinishing furniture at night and on the weekends.   Now, we are back in Texas and I live in a great little waterfront house (has been our goal since we got married), I am my own boss and I am working from home.  Wow.  I might be the luckiest girl in the world.

Wednesday, August 21, 2013

DIY Refrigerator Enclosure

January 2016 Update: Visit our new blog www.brianandkaylor.com  


Today I am going to show you my refrigerator enclosure.


Just to remind you, the previous refrigerator was big, white, bulky and hanging out at the end of the cabinets.


As soon as I knew we were buying the house the wheels were turning and I started researching on how to fix the fridge problem.  There had to be a way to make it look like it belonged in the kitchen and not just shoved at the end of the cabinets.  I saw several people on the blogosphere built enclosures for their refrigerators and added it to the current cabinetry.  GENIUS!!

  Here is an example of what I am talking about.

Just add a box...simple right.  BAHAHA!!!!!   I should know better.  The problem with a project like this is no matter how good the tutorial is or detailed the pictures are, each situation is different.  My cabinets are a different size, my refrigerator is a different size (I purchased a counter depth), my ceiling height is different....you get my point.  I had to come up with a strategy for my situation.  It wasn't too bad but it did not turn out exactly as planned.

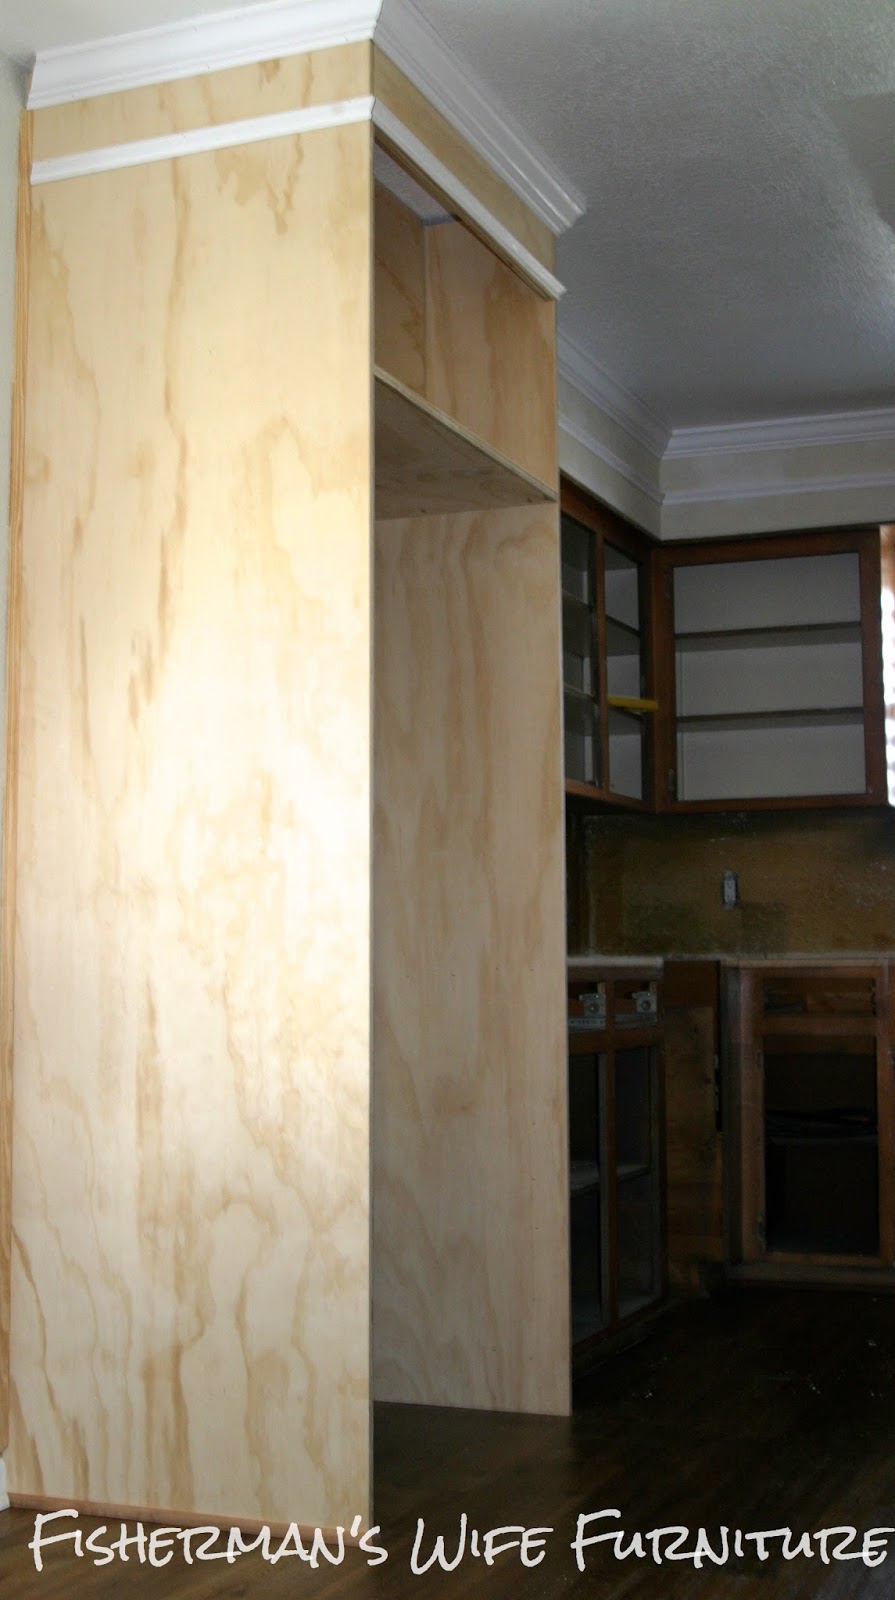
My first problem was most of the tutorials had a set of cabinets to use above the fridge that matched the current cabinets.  This made it look like the box was built with the cabinets.   I tried to take my current ones down and they wouldn't  budge.  The cabinets were built off of each neighboring cabinet.  Meaning, I coudn't get the cabinets above the fridge down without hurting the ones next to it so I had to scratch that idea.   Since I could not remove the cabinets above the fridge I had to build the box around them which complicated things.  I decided to cover the cabinet and put a shelf over the fridge instead.  I now have a home for my cookbooks.   Here are some progress shots.


The moldings on the fur down are continued around the new enclosure.  Read about the space of the cabinets here.

I used my handy dandy Kreg Jig to make all the connections hidden.  This also helped with the braces we put along the back and gave me a way to secure the box into the floor.  For me that was the scariest part....drilling holes into my new flooring.  Talk about a measure 10 times, drill once kind of situation.


Here are the after pictures and yes I still have the stickers on my fridge.  It has been moved around a lot so I have tried to protect it as much as possible.  Also, I can't find my cookbooks.  At the moment, they are lost in the hot steamy abyss also known as the POD. :)


 custom furniture Galveston Houston Tx, white kitchen, painted kitchen cabinets, DIY refrigerator enclosure


I. LOVE. IT.  Other than the paint color, buying a counter depth fridge and having it boxed in has totally changed the room.  It feels so much bigger!  Thank you to my husband for trusting me with this idea and helping me with it.  Sometimes I can tell he is not so sure about my crazy ideas (not sure why) but trusts me anyway and helps me when I ask for it.  Thanks, babe!


UPDATE:


Click here to see all the before and after pictures of the kitchen.


This post was a runner up in One Project Closer's The Better Half Before & After contest!  Pretty Handy Girl was the Co-Host that week.  Check out the winner and other runner-ups here!

he Humble Brag Supporting Habitat for Humanity