
In yesterday's post I talked about how we came to the decision to have butcher block countertops. (Read about it here) Today I am going to tell you how we did it.

This is a really long post but if you are considering doing butcher block countertops yourself, it is worth the time.
STEP 1:
Decide on which butcher block you want. At Lumber Liquidators there are four choices in wood type: American Walnut (a little more expensive), American Cherry, Maple, and White Oak. You can stain any of these to achieve the color you want. I wanted something with natural tones so I went with the American Walnut. It has natural variation in color and has a warm brown tone without stain that goes well with the rest of our home. IKEA also has butcher block for purchase but they do not have as many options in types and the longest section they sell is 8 feet.
STEP 2:
Measure to calculate how much to order. Think about how you are going to connect the different pieces. If you do a 90 degree connection your lengths might be different than if you do a 45 degree connection.
90 Degree Connection - 2 rectangular pieces put together

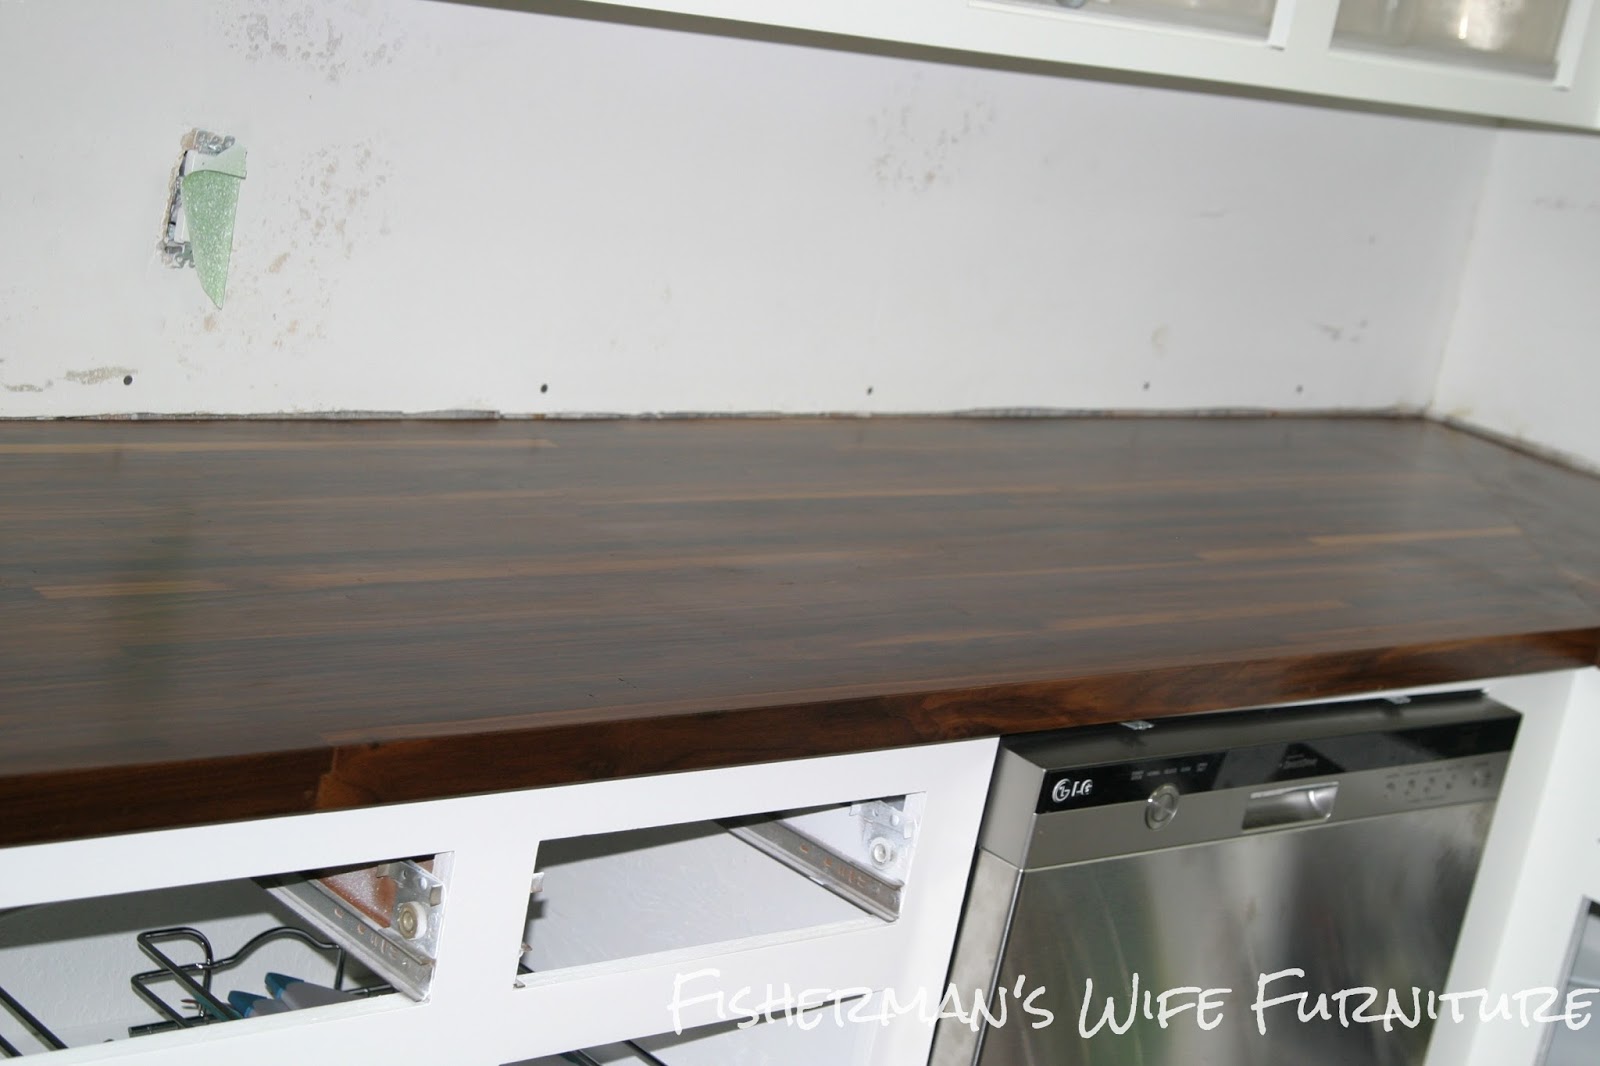
45 Degree Connection

Blittle and I both thought the 45 degrees looked more professional and resembled a "normal" countertop the most. For our kitchen, we ordered one 12 foot section and two 8 foot sections. These are not carried in stock at Lumber Liquidators so you have to order online or call/visit the store to order. They were delivered in a week or two so keep that in mind when you are scheduling. We picked ours up from the store instead of paying for delivery to the house. They are HEAVY but we moved them on our own so this can be a two person job but a third person would be helpful for extra muscle.
When you open the box and see that it looks rough and there are scratches DON'T FREAK OUT. There is an obvious right side (top of countertop) and wrong side (bottom of countertop). The bottom is not sanded at all! Here is what our bottom looked when we opened the box.

You can see some scratches and that it is not very smooth.
Here is the top side.

Definitely smooth!
SIDE NOTE:
Let's talk about prep and protection. Usually butcher block is wiped down or coated with food friendly Tung oil or other food safe oil. When you use butcher block as a countertop that will be exposed to more water (around a sink and dishwasher) and heat (the oven and stove), it needs to be protected differently. There is a company called Waterlox that makes products just for wood countertops and wood floors.
I followed these directions I found on the Waterlox website that are specifically for butcher block as a countertop. These products are not cheap but a little goes a long way. For our counters I ordered 1 gallon of the Sealer/Finish ($70) and 1 quart of the Original Satin Finish ($36).
STEP 3:
I put 3 coats of Sealer/Finish on the bottom side waiting 24 hours between coats. Doing this helps protect the bottom from moisture from the dishwasher and under the sink as well as from heat released by the oven and stove. This will inhance the color immediately.
Bare Wood.
First coat.

STEP 4:
Making cuts. Obviously everyone's are going to be different but I can tell you what we did. Our first cuts were for overall length. Meaning wall to wall or wall to end of the cabinet. We had three large rectangular pieces that fit in place but now we needed to make the 45 degree cuts.
Using a protractor we measured our 45 degree cuts. Protractor? Yes, a huge one. You find them at Lowes or other hardware stores. There are large protractors usually used to measure angles for crown moulding. We measured, measured and re measured our angles. It was absolutely nerve racking making those first cuts but we finally went for it. I recommend a new saw blade for this. Butcher block is thick, heavy and hard on your saw. Go slow and let the blade do the work. Sand your cuts smooth.
Why is there tape in the picture? We put tape on the edges to protect the wood when we were cutting and testing our fit. Not sure if it did anything but it made me feel better.

Put the pieces in place to check for fit. Make any length adjustments now.
STEP 5:
Prep for the fasteners. We used wood fasteners I ordered online and used a router to cut the grooves for them. To be safe we tested our router depth and size. We made a template out of plywood and tested it on scrap butcher block before we worked on the real countertops. We laid the counters on the floor next to each other, upside down, lining them up like they would be when they were installed. We decided to do 3 fasteners at each joint. We traced the template then used the router to make the grooves. (I can't find pictures of this step for some reason. Sorry. I guess I forgot to take some. DUH.)


STEP 6:
Now install and fasten. Put your counters in place on the cabinets. You might have to do something adjustments but things should fit well. Be sure to look at the corners lining up and check to see if they are level. Ours were pretty easy and we did not have to do much adjusting.
SIDE NOTE:
We had to install our sink BEFORE we could install the counters. Due to the sink's size and location and our cabinet size and plumbing, our under mount sink could not be installed after the counters. If you have a drop in this should not be a problem, but if you have an under mount please keep this in mind.


Here are the fasteners under the counter installed and tightened.

STEP 7:
Filling cracks and evening out joints. Since we had walnut counter tops I bought walnut filler and I mixed it with some saw dust that I saved (there will be plenty! just put it in a ziploc until you are ready to use it). This causes the seam to have color variation just like the rest of the counter and not just a single colored seam. After it is filled, sand smooth.


Seam before its filled

Seam after its filled.

STEP 8:
Sealing with Waterlox. If you would like to stain your countertops, do it BEFORE Waterlox. I chose not to but it is an option. Apply the stain like you would to any surface. Wait at least 8 hours for it to dry then apply your coats of sealer. I used a Wooster stain brush to apply the coats. Be sure to clean it well after each use. I put 4 coats of the sealer/finish (5 around the sink and faucet) and 3 coats of the Satin finish. Yes, I waited 24 hours after each coat and yes, I sanded between each with 400 grit paper. I do recommend waiting the 7 days after your final coat for heavy usage. Although the countertop will be dry, it is not be fully cured and can not handle everyday use yet. BE PATIENT.


ENJOY! It was a lot of work but we used less than half our countertop budget and were able to put the money saved towards splurges like a counter depth refrigerator and double ovens. I am extremely happy with the butcher block and even though it wasn't my first choice, now I can't imagine any other countertop in the space.


Hi Kaylor, Thanks for sharing your process. It's very helpful to see pictures. I have a few questions. Did you use a palm sander for preparing for the waterlox? I know their site says to use 100 or 150 grit sand paper. Also, it looks like you left the front edge square which looks very nice, but wondering how it is holding up. We wondered if rounding it a bit with a router might be keep it from getting bumped or dented. Thank you! dkr
ReplyDeleteHi. I hand sanded with 220 then 320 in the direction of the grain. When you get your countertop, the pretty side is already is already smooth and doesn't need a lot of sanding. Palm/electric sanders can mark up the wood if you are not careful so I didn't even try it. I used 320 between each Waterlox coat.
DeleteWe thought about routering the edge to make it pretty and fancy but then decided against it. The square edge looks great and is holding up fine.
Thank you! That was very helpful. I was questioning the palm sander, so we are going to go with the hand sanding and leave the handsome square edge. I am so looking forward to the beautiful walnut counters. dkr
ReplyDeleteThis is STUNNING!!!!!! And you did a fantastic job at explaining the whole process. Please come share this on DIY Sunday Showcase, a party I cohost. It's open now!!
ReplyDeleteShelly
minettesmaze.blogspot.com
Thanks for visiting! I just posted it.
DeleteYEAH!!! I'm deff posting this to our board!!!!!! Thanks for sharing and be sure to come back!!
DeleteShelly from MinettesMaze
Hi! Could you tell me approximately how many days the seal and installation process took? Thanks!
ReplyDeleteHi Diana. Cutting the butcher block and installing it could be done in a weekend as long as your cabinets are already prepped for the new counter and you have everything you need. We tackled this project during the week so most of it was done after my husband got home from work. It took us 3 or 4 evenings, working a few hours each time to get everything cut and installed. Each coat of waterlox needs 24 hours to dry between coats. I did 4 coats of the sealer and 3 coats of satin finish so it took a week for that plus I didn't let anyone near it for 2 days after the final coat :) I was a little paranoid. I hope that helps you. Let me know if you have anymore questions. I am happy to help any way I can.
DeleteI checked out your blog. Love it.
Could you tell me where you ordered the connectors? I'm trying to source them now.
ReplyDeleteThanks!
-jennifer
Hi. This is the link to the fasteners I used. http://www.wwhardware.com/deerwood-joint-fasteners-sc29
DeleteIn some photos your counters (beautiful by the way) look lighter than in others. I am consider butcher block over cherry cabinets and was thinking lighter. Is there a wood or something specific I might need to do to keep it lighter?
ReplyDeleteHi. The color difference has to do with lighting in my pictures. My counters are darker but that is what I wanted. They are American Walnut which is a naturally darker wood. Lumber Liquidators offers several types of wood for butcher block with walnut being the darkest. You will want to go with one of the lighter woods. Probably maple or oak. All of the countertops are stainable so if you think the oak or maple is too light you can stain. Keep in mind that if you use Waterlox to seal your countertops, it will darken them slightly. Thanks for visiting!
DeleteYour counter are GORGEOUS! We just totally remodeled our kitchen and got rid of our butcher block counter and got new soap stone. Now I'm kicking myself for not refinishing and keeping them. :(
ReplyDeleteHi, Paula. Thanks for visiting. I love the butcher block but soap stone is great too and very durable. We looked into getting it but now that I have the butcher block, I can't imagine anything else feeling right in that space.
DeleteHi! I'm getting read to start my counters this weekend. We have a similar layout. As I'm trying to go over everything in my head, I'm wondering how I'm going to install these fasteners. Did you fasten the 3 pieces of block together and then install it as one piece? Or were you able to reach the fasteners underneath, through the cabinets? I don't know if we'd be able to lift these counter tops into place as one piece--they're so heavy! But it also seems like it'd be difficult to get the fasteners to tighten down in place if I were reaching through the cabinets. Any advice? Thanks for sharing this tutorial and I hope mine will come out looking as beautiful as yours have!
ReplyDeleteHi, Allison. We used the router to make the insets before we installed but fastened afterwards. There was no way we could carry it as one huge piece. The way our cabinets are laid out, we were able to reach the fasteners from underneath reaching through a cabinet door after all three pieces were in place. It was awkward and not comfortable but it didn't take long and you only have to do it once. Good luck. Let me know if you have anymore questions.
DeleteWe are considerring doing this. Thank you for the inspiration and making it look feasible! One question: Are these heat resistant?
ReplyDeleteWe're about to embark on butcher block countertops as well. How are yours holding up? Any issues so far?
ReplyDeleteHi. They are holding up well. I cook almost every night so our kitchen is definitely a used space. You do have to be more careful with them than other countertops but it hasn't been a problem for us.
DeleteYour countertop looks amazing. We did something similar also using waterlox. We applied 3 coats of sealer and 2 top coat --just because it looked better--. we've had the piece in the garage for more than a month and I don't think the finish has cured --I can still scratch it using my finger nail--. How long it took your piece to cure before installing it?
ReplyDeleteHi, we've stained our butcher block in the basement (not yet installed) and I'm have questions about once we get to sealing it. In sealing the underside first, would you flip the counters over or simply seal them while it's right side up? I'm afraid of marring the stain if we flip it over, but I'm not sure if it's possible to seal from the bottom. And as far as how toxic the fumes are, would we be ok doing it in the basment, or do we need to do it outside?
ReplyDeleteThanks!
Hi, Hannah. If you have it up on a saw horse or something similar so you can get under it, I don't see why you couldn't seal it from underneath. If the stain is dry, flipping shouldn't be a problem either. Just put some blankets down to protect it. I used Waterlox to seal and the fumes are pretty strong. I did a few coats after the countertops were installed and had to put a fan in the window as well as open other windows and doors. As long as you have a way to ventilate and get fresh air in the basement, it shouldn't be too bad.
DeleteThanks so much for your answer.
DeleteMy latest question is regarding the seams. Where we had to seam two pieces together, the wood glue apparently lightened the wood and is showing through after two coats of stain. We had them sanded down well, so I'm not sure what to do. Should we sand those spots down again and try to restain, or would the entire countertop need to be re-sanded?
Thank you!
Thanks so much for your answer.
DeleteMy latest question is regarding the seams. Where we had to seam two pieces together, the wood glue apparently lightened the wood and is showing through after two coats of stain. We had them sanded down well, so I'm not sure what to do. Should we sand those spots down again and try to restain, or would the entire countertop need to be re-sanded?
Thank you!
hii.
ReplyDeleteI really appreciate your tips. It is a butcher block countertops are very interesting and beautiful are also decorative.
Hi Kaylor,
ReplyDeleteI just emailed you about featuring this on Remodelaholic -- but I thought I'd leave a comment, too, since sometimes my emails get caught up in spam filters. :) Drop me a line at hello@remodelaholic.com please!
Your counters are beautiful! My husband & I are getting ready to install a butcher block countertop on our island. I have read & read, and read more blogs about this than I ever wanted to, lol! The one thing I cannot find is information on the actual installation of the countertop. Can you tell me how you did yours? My husband is talking about screwing it to the cabinets from the underside & using Liquid Nails in spots where a screw won't work. Any tips?
ReplyDeleteHi. We just set our butcher block on top of the cabinets. There was discussion of trying to screw them in or use liquid nails but they are so heavy and when we put them in place, they were extremely sturdy as is. We decided to not bother with screwing them in or using any glue. We figured we could always add more support if needed. Two years later, they haven't moved. :)
DeleteI hope that helps. Good luck!
I love your backsplash is that regular glass single subway tile? if so, care to share where you purchased them?
ReplyDeleteHi. Thanks. All product details are in the Kitchen Reveal post. http://fishermanswifefurniture.blogspot.com/2014/05/kitchen-reveal-update.html
DeleteIt is glass 4x12 subway tile and must be ordered from a distributor. The company name and tile color is in link above. Thanks.
Hi, they look beautiful!! Did you order the American grade versus the builder grade on the walnut butcher blocker from LL? I saw both online and they look similar. Thanks!!
ReplyDeleteHey - what's the thickness of the counter top? Thanks!
ReplyDeleteSuper Blog.
ReplyDeleteI read your article, all the informations that you share are benificial for us.
Your information is very nice about diy countertops
I have not had much luck with Waterlox. With the satin it streaks - I tried the Wooster brush. I also tried an old t-shirt, a t-shirt inside a nylon sock, a sponge brush. Once dried there are streaks. I have sanded and resanded and each and every time I try to redo it there are streaks. Did you have any streaks when you applied the Waterlox?
ReplyDeleteI have not had much luck with Waterlox. With the satin it streaks - I tried the Wooster brush. I also tried an old t-shirt, a t-shirt inside a nylon sock, a sponge brush. Once dried there are streaks. I have sanded and resanded and each and every time I try to redo it there are streaks. Did you have any streaks when you applied the Waterlox?
ReplyDeleteBeautiful! Question; do you have to do any maintenance after you seal the wood? We just used butcher block to make a desk and I'm going to stain and seal it, but then is that it? Or do I still need to oil it every so often? Thank you! And thank you for sharing your beautiful work!
ReplyDeleteYour counter looks beautiful. I'm installing the same type next week. I'm nervous about the sink cut out, how did you do yours?
ReplyDeleteAmazing post.
ReplyDeleteYour blog give best suggestion about countertop transformation.
affordable diy countertops
They are beautiful! And walnut is my favorite wood.
ReplyDeleteLove all
ReplyDeletehardwood flooring
I love your counter tops. How did they compare in cost to other kitchen counter tops on the market.
ReplyDeleteIt is a pretty good post. This post contains useful information which helps us a lot. I visit your website often and share with my friends. office furniture Miami
ReplyDeleteIts such an great post about Why is Walnut wood Furniture More Expensive.
ReplyDeleteClick To Download 16,000 Woodworking Plans
ReplyDeletehttp://woodworkingplanspro.weebly.com
16,000 Woodworking Plans With Step-By-Step Details, Photos, Materials Lists And More!
Hope it will help you next time !
Great Post Thanks for sharing this informative post.
ReplyDeleteWhat type of tile did you use? I like the bigger tiles and the color. Also where did you find them? Thank you for posting this!
ReplyDeleteamazing designs of countertops.. thanks for this nice post
ReplyDeleteCounter tops in nj
Thanks for the great tutorial, I found it very informative. We are going to be installing butcher block but are currently torn between how we should finish/seal the counters.
ReplyDeleteI love the concept of using mineral oil or mineral oil/bees wax so that if any damage arises in the future you could (somewhat) easily sand that down and reapply oil. On the other hand though I like the idea of waterlox so that you wouldn’t have the regular maintenance but it seems that repairing the inevitable dings and scratches in the future wouldn’t be an easy endeavor.
After several years with your butcher block do you have any regrets with the waterlox finish?
Thanks!
Online casino websites in Thailand, online gambling, slot machines, online casinos, casinos, lottery, lottery, services provided by a fast professional team. Vegus168
ReplyDeletewww.vegus666.com
Ngoc Tuyen Computer Company specializes in receiving the best liquidation of high definition systems in Vietnam
ReplyDeleteThanh lí dàn nét
Lắp đặt phòng net
Máy tính chơi game
Another advantage of Marble Countertops is that it is waterproof. Unlike other stones, your marble will not suffer water damage. However, marble is one of the stones that you need to seal professionally.
ReplyDeleteGranite kitchen countertops are very stylish and instantly add to the value of any room or home where you are.
ReplyDelete
ReplyDeleteThank you for writing such a nice blog with useful information
Cadbara Digital Marketing Company
ReplyDeleteWow.This is very interesting post. i like it. your post is about kitchen countertops . but i give you advise if you will use silver countertops in kitchen . then your kitchen are so beautiful . please read our blog
ReplyDeleteUsually I never comment on blogs but your article is so convincing that I never stop myself to say something about it. You’re doing a great job Man,Keep it up.we provide good quality countertops. please visit our site if you want more information. Thank you for visit .
Enjoyed reading the article above, really explains everything in detail, the article is very interesting and effective. Thank you and good luck with the upcoming articles. We provide the countertops for your home. if you want more information about countertops. please visit our site. Thank you for your visit.
ReplyDeleteExcellent read, Positive site, where did u come up with the information on this posting? I have read a few of the articles on your website now, and I really like your style. we provide good quality kitchen cabinets in Columbus. If you want more information please visit our site. Thank you for your visit.
ReplyDeleteI am looking for some good blog sites for studying. I was searching over search engines and found your blog site. your article is very good. I like it. But we provide kitchen cabinets for your home. If you want more information please visit our site. Thank you for visiting the site.
ReplyDeleteWonderful site. Lots of useful info here. Im sending it to several pals ans additionally sharing it deliciously. And obviously, thanks to your sweat! I give you advice if you want good quality kitchen cabinets for your home then we provide the best kitchen cabinets. please visit our site. Thanks for your visit
ReplyDeleteExcellent read, Positive site, where did u develop the data about this posting? I've read a couple of from the articles in your website now, and I like your look. we offer top quality cabinets in Columbus. If you would like more details please visit this website. Appreciate your visit.
ReplyDeleteAlso read: 5 1/2 Kitchen Cabinets Remodeling Design - Tips to Improve
Enjoyed studying the content above, really explains all things in detail, the content is extremely intriguing and effective. Thanks and have fun with the approaching articles. We offer the countertops for your house. if you would like more details about countertops. please visit this website. Appreciate your visit.
ReplyDeleteAlso read: Pros and Cons of Matte Countertops
I'm searching for many good blogs for studying. I had been searching over search engines like google and located your site site. your article is excellent. I love it. But we offer cabinets for your house. If you would like more details please visit this website. Here you are at the website.
ReplyDeleteRelated: How to buy luxury furniture from an online furniture store?
Usually I never comment on blogs but your article is so convincing that I never stop myself to say something about it. You’re doing a great job Man,Keep it up.
ReplyDeleteRelated Content: Tips to Care and Maintenance of the Quartz Countertops
At Anatomy Rehab, we make different treatment plans for our patients. These plans are based on the ailment they suffer from, the intensity of the pain/condition and other such factors. With our services, you can get maximum functional restoration and improved quality of life.
ReplyDeletePhysiotherapy Center
Enjoyed reading the article above , really explains everything in detail,the article is very interesting and effective.Thank you and good luck for the upcoming articles.
ReplyDeleteAlso visit: 5 Tips to Buy Fabuwood Kitchen Cabinets Online
This comment has been removed by the author.
ReplyDeleteAventura Word Hunt integrates the Adventure Park circuits and team building activities in Dubai into a fun and active experience.
ReplyDeletePiramal Realty is one of the best real estate company in Mumbai, India. We have a huge range of residential & commercial projects across major cities of India.
ReplyDeleteVisit: https://www.piramalrealty.com/
We’re so certain you won’t find the same high standards anywhere else, we’ve staked our reputation on it. Our continuing quality of service is our commitment to you. Courier Services Southall
ReplyDeleteInformational & Helpful Blog. Your way of writing is amazing. It is good Article Writing Website.
ReplyDeleteGreat Article.
ReplyDeletebape
ReplyDeletebirkin bag
lebron 18
paul george shoes
supreme new york
golden goose
goyard handbags
supreme shirt
kevin durant
moncler
Amazing nice work. love your almost blog posts.
ReplyDeleteplz do visit our websites
Software Development Company in USA
Digital Marketing Services in USA
SEO Company in USA
Website Development Company in USA
Graphics Design Services in USA
Digital Marketing Company in USA
Thanks for sharing
ReplyDeleteSocial Network
Free Amazon Products
Direct Deals from factories
DIY Hobbies Products
Direct Deals from factories
Thanks for sharing
ReplyDeleteMake New Friends
DIY Hobbies Parts
Direct deals from factories
Deals & offers
Amazon Free Products
Hey! I found this URL from one of my Facebook group and believe me you have provided awesome content, which
ReplyDeletewill help many of us.
B2B Lead Generation Agency
ReplyDeleteLogistics Services Canada
Accounting Services Canada
Bookkeeping Services Toronto
Key factors of benefits to invest in digital marketing
ReplyDeletehttps://www.aknitech.in/
ReplyDeletehttps://titandijital.com.tr/
ReplyDeleteağrı parça eşya taşıma
maraş parça eşya taşıma
muğla parça eşya taşıma
uşak parça eşya taşıma
04H5
GNJYHGJN
ReplyDeleteرقم المجاري بالاحساء
Thanks for this article! The tips have made a real difference in my setup. I encourage everyone to check it out for more useful tips Polling Rate Test. Running a mouse polling rate test can boost your gaming performance by reducing lag.
ReplyDeleteشركة رش مبيدات بالاحساء uXFsYTMMyE
ReplyDeleteشركة عزل مواسير المياه بالجبيل lVA0IR8nb5
ReplyDelete<a href="https://elrokn-elmethaly.com/%d8%b4%d8%b1%d9%83%d8%a9-%d8%b5%d9%8a%d8%a7%d9%
ReplyDeleteThis is certainly a compelling topic to explore. If you need any assistance with tax filing, be sure to visit Installtubotax.com. we're here to make the process simple and stress-free.
ReplyDeleteGreat article its really informative and innovative keep us posted with new updates. Looking for reliable lead generation companies in dubai? Get quality leads, boost conversions, and grow your business with expert marketing solutions!
ReplyDeleteAwesome blog post! I found the details very helpful and easy to follow. Keep it up!
ReplyDeleteThanks for writing this! I’ve been more mindful about giving feedback lately. Just did a Kroger survey at kroger.com/feedback and it only took a few minutes.
ReplyDeleteI love this creative and practical solution for waterproofing under the sink. Using Plasti Dip to create a seamless, durable barrier is both innovative and cost-effective. The step-by-step approach, from removing the damaged base to applying multiple coats, is clear and easy to follow. While tackling challenging tasks likeFinance Assignment Help UK , it’s inspiring to see such straightforward DIY projects that protect and improve home spaces. This project is a perfect example of how thoughtful home improvements can make a big difference. Thanks for sharing this inspiring idea!
ReplyDeleteShow off your sense of humor with the embroidered QR code Rick Roll patch. Scan it with any phone and watch as it links to Rick Astley’s legendary song. Inspired by rick roll QR code cross stitch patterns and viral QR code shirts, this embroidered patch gives you a durable, stylish way to prank your friends. Perfect for backpacks, hats, or denim jackets, it mixes traditional stitching with a modern meme. Fun, unique, and always ready to surprise, it’s a patch worth wearing. Visit our website. https://rushpatch.com/blogs/news/embroidered-qr-code-rick-roll-turning-a-meme-into-art
ReplyDeleteBeautiful DIY transformation! The step-by-step process and finish look amazing. Homeowners often find hidden dampness under countertops due to plumbing leaks. At Wet2Dry Solutions, many people request water leakage detection services near me to identify such issues early. Loved your detailed walkthrough!
ReplyDeleteLoved this DIY project! Your butcher block countertop transformation looks amazing, and the steps were explained perfectly. At LeakFoe, we apply the same attention to detail when using waterproofing liquid for terrace applications to protect homes from moisture. Beautiful work!
ReplyDeleteThese look absolutely stunning! The walnut tone is gorgeous and that 45-degree connection really does look professional.
ReplyDeleteQuick question - did you have any issues with bugs or pests getting into the sawdust while working on this project? I just finished a similar kitchen reno and had to call Washington Pest Pros
because carpenter ants were attracted to the wood scraps in my garage. They mentioned that wood dust and debris can draw pests if left sitting too long.
The Waterlox finish sounds like great protection. Does it help keep moisture out completely around the sink area, or do you still wipe up water pretty quickly?
Beautiful work - definitely worth the effort!
Thanks for the informative content! It really cleared up a lot of my doubts. By the way, if anyone’s recently visited McDonald's, don’t miss the chance to share your feedback at www.mcdvoice.com survey.
ReplyDeleteGreat job on this post. The content is well-organized, and the explanations are easy to follow. I found the information very useful and relevant. It’s clear that you’ve put thought into making this article helpful for your readers. ca Lottery
ReplyDeleteThanks for this insightful post! It was a great read. By the way, for those who are music enthusiasts like me, don’t forget to pair your devices seamlessly using spotify.com pair—it makes streaming so much easier!
ReplyDeletefacts stated in this article have been worked upon very incredibly. To take the www.mcdvoice.com survey, customers need a recent McDonald’s receipt with a survey code printed on it.
ReplyDeletegood attempts of explanation here. Taking the tellculvers survey is quick and easy. First, keep your receipt after visiting Culver’s, as it contains the required survey code.
ReplyDeleteReally enjoyed this content. Keep posting more!
ReplyDeleteKüche folieren is a simple and affordable way to refresh your kitchen. Upgrade countertops and cabinets with stylish adhesive films without the cost of a full renovation. For full info, you can check out our website: Küche folieren